


It was a lot easier than I expected it to be. Almost everything is incredibly intuitive. And the few things that weren’t (read on!) were easily figured out. That’s one of the benefits of using a platform that is so popular and well supported. So, if you’ve been thinking about doing it, this post is for you! It’s not meant to cover every single little thing because most of it will come naturally, but there are a few things I wish I’d known when I started.
I’ll share links to some of the products and services I use. Some of them are affiliate links which means if you purchase from these companies, I may receive a small commission at no cost to you – and some of these links include discounts.
Update! I was approved as a Verified Merchant on Pinterest about 24 hours after applying. Since some people have a tough time getting approved, you might want to see what I did to increase my chances.
Deciding What to Sell in My Shopify Store

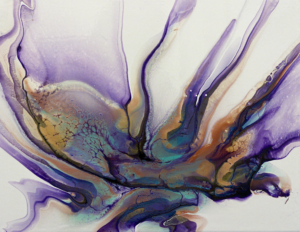
Originally, I thought I should sell my original fluid art. But I knew I was going to have trouble pricing it and that shipping would be a pain, so I decided to use a print-on-demand service to create prints, apparel, and accessories with my designs on them. Of course, this means profit margins are slim, but since it would practically be passive, I’m OK with that!
Choosing a Store Name, Buying a Domain, and Setting up Email
OK, this is where it got a little bit technical. The store name came (Deep Blue Fluid Art) easily and registering a domain name is a snap, but getting name servers set up to direct to a store was a bit tricky for me. Fortunately the domain registrars give you step-by-step help.
The bigger challenge was setting up email so I could send and receive via gmail. Because I wanted to set up a shopping feed and become a Verified Merchant on Pinterest, I needed to have a domain-specific email address, and I didn’t want to be checking email at another location. I swear I entered the same POP setting 43 times before it actually went through.
Creating a Logo in Canva


Canva has lots of great templates for logo creation. I started with a pretty generic one and a few days later went back and created one using one of my paintings as a background. I uploaded it to my Pinterest account and my store theme a few times before I got it to look good when really small.
Setting up a Shopify Store
Because of their incredible integration with Pinterest, using Shopify wasn’t ever a question. I want that Verified Merchant Status (you get more distribution and preferred placement when you’re verified)!
What I didn’t expect was just how easy it would be to set up a store. It was done in minutes. A few minutes more spent customizing the theme with some colors and a logo and voila! There it was!
Setting Up Shipping Options
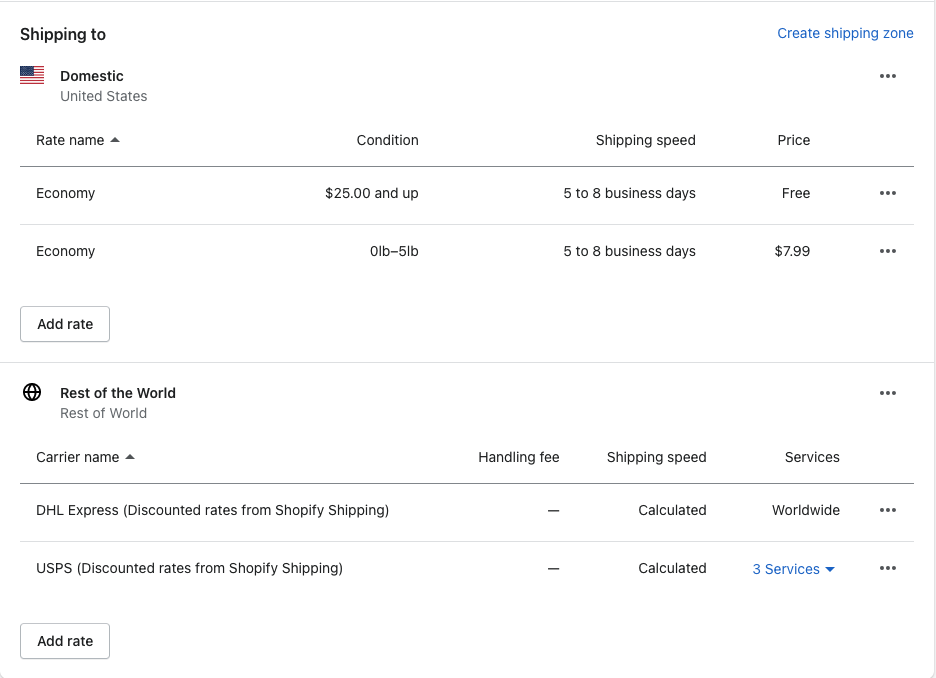
This one has proved to be the most complicated for me. I wanted to offer free shipping to the US because I know how sensitive shoppers are to shipping costs. I offered free shipping on orders of $25 or more.
It’s easy to set shipping rates for your Shopify store. Go to Settings > Shipping and Delivery, and add that rule in “manage rates.”
Note that this setting ONLY applies to products you add to your store manually and to certain apps, like Printify. To apply these rates to items supplied by other apps, like Printful or Gelato, come back to that page and set up the rules under App shipping profiles. Learned this one the hard way when my first order should have had free shipping but didn’t. Fortunately, it’s really easy to refund a customer from the Order screen.
I added a free shipping conversion bar from Conversion Bear (which is also free) that not only lets people know about the free shipping option, but encourages them to add more items to reach that free shipping threshold. I’m trying not to add too many apps right away, but this one seems really useful.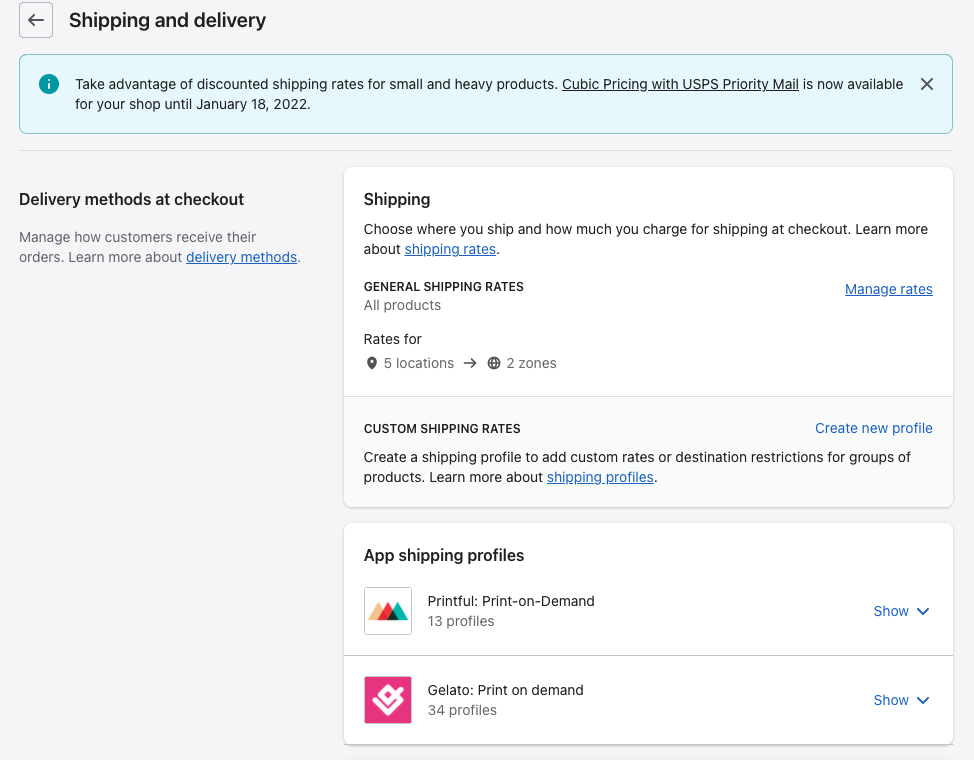

For international shipping, I’m allowing the apps to figure and charge the actual cost. Get to this screen from the ‘Manage rates’ links from the shot above.

Because I was using print on demand, I added a couple of Apps right in Shopify for the shops I decided to use. I went with (after trying a bunch!) Printful and Printify. Printify has lower prices on canvas but Printful is kind of the gold standard of POD and was recommended to me by fellow artist Jana Oliveira!
One weird little quirk is that you must go through your Shopify account and click on the app link for your print-on-demand suppliers in order to manage or add products. If there is a way around this, I’d love to know, but it’s not a big deal.
Another confusing thing is that whichever app you are using, the product list will include items from all suppliers. Fortunately it does show you the supplier name in the right-hand column.
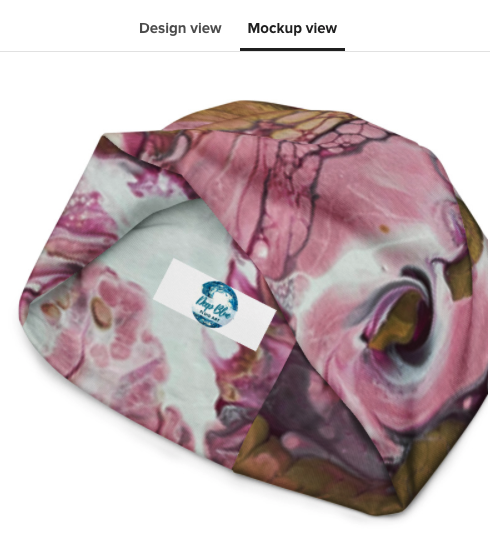
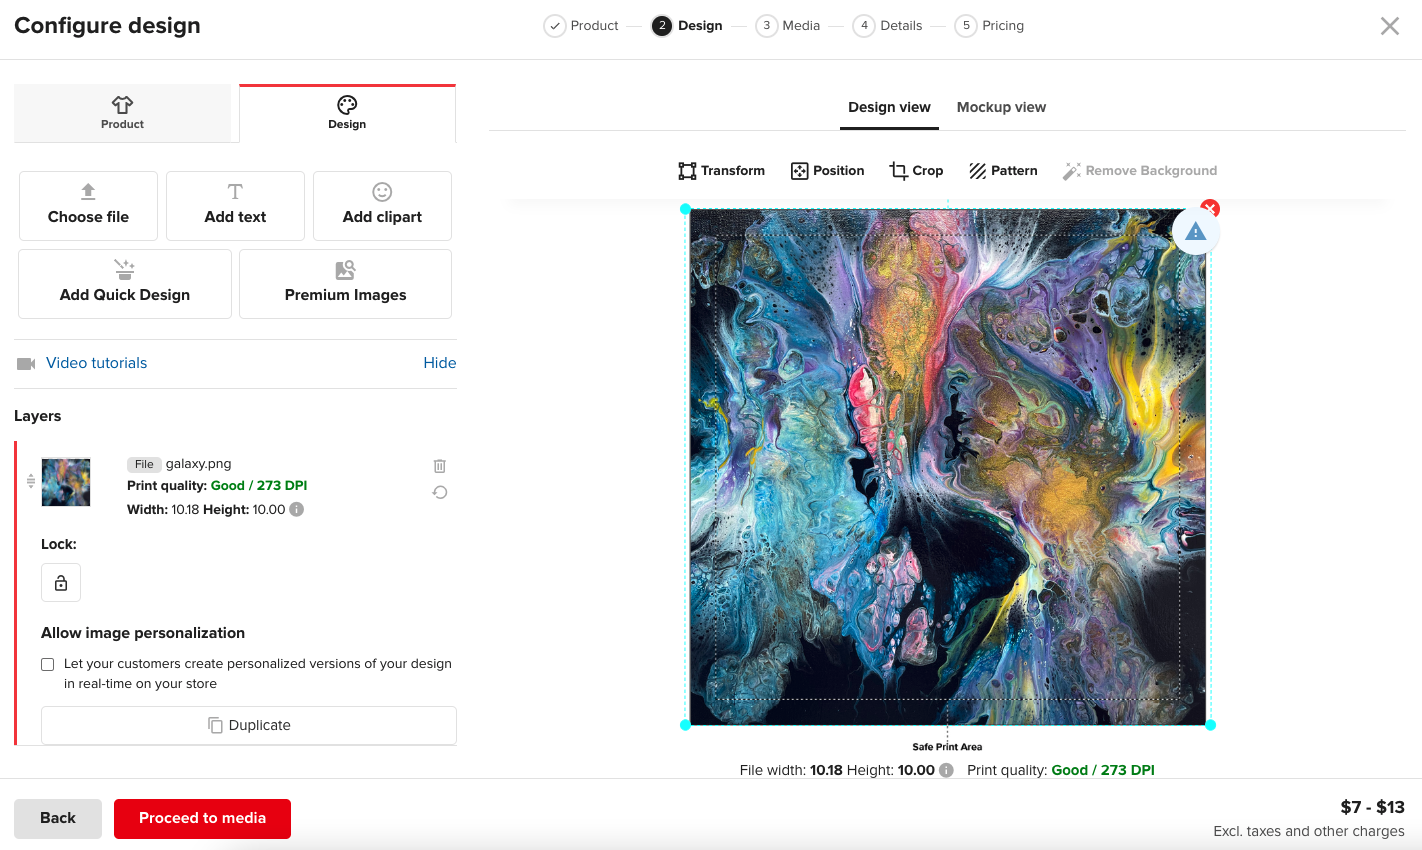
Adding products is as easy as choosing the item you want to offer (let’s say, and allover print shirt), uploading the design and moving it around until it looks JUST right. Make sure you select the sizes and color options you want, too. Then click on the mockup view to see how it will look. Pay attention to warnings about image size. You don’t want your first customers to be disappointed by poor print quality.

A friend was curious about the process, so we made a new item together. It took all of 90 seconds. And it looks great!
You really need ZERO training here – it’s so intuitive.
Once you proceed to media, you’ll have more options of mockups to choose from.
Just to make sure everything is going to look just right, I placed a sample order, which, at Printful, you can get for 30% off your prices.

Writing Product Descriptions
The print-on-demand shops will create a default description for every item, which is handy, but you’ll want to go in and tweak that to describe the design and add a little catalogue flair! I ended up writing a fairly standard description of each painting and just modifying it slightly for the different items.
This one could use some more thought and its own blog post. How many times have you purchased an item because the description convinced you that you needed that thing in your life immediately?!?
Warding off Returns on Non-Returnable Items
Because all of my items are made to order, I can’t get refunded for anything a customer returns. 🙁 So, my policy is to only accept returns on defective items. It’s a little unorthodox, so I made sure to add that disclaimer to the description of EVERY product in the store.
Oh, and returns or no, make sure, if given the option, that you include size charts in all apparel descriptions.
Tagging Products
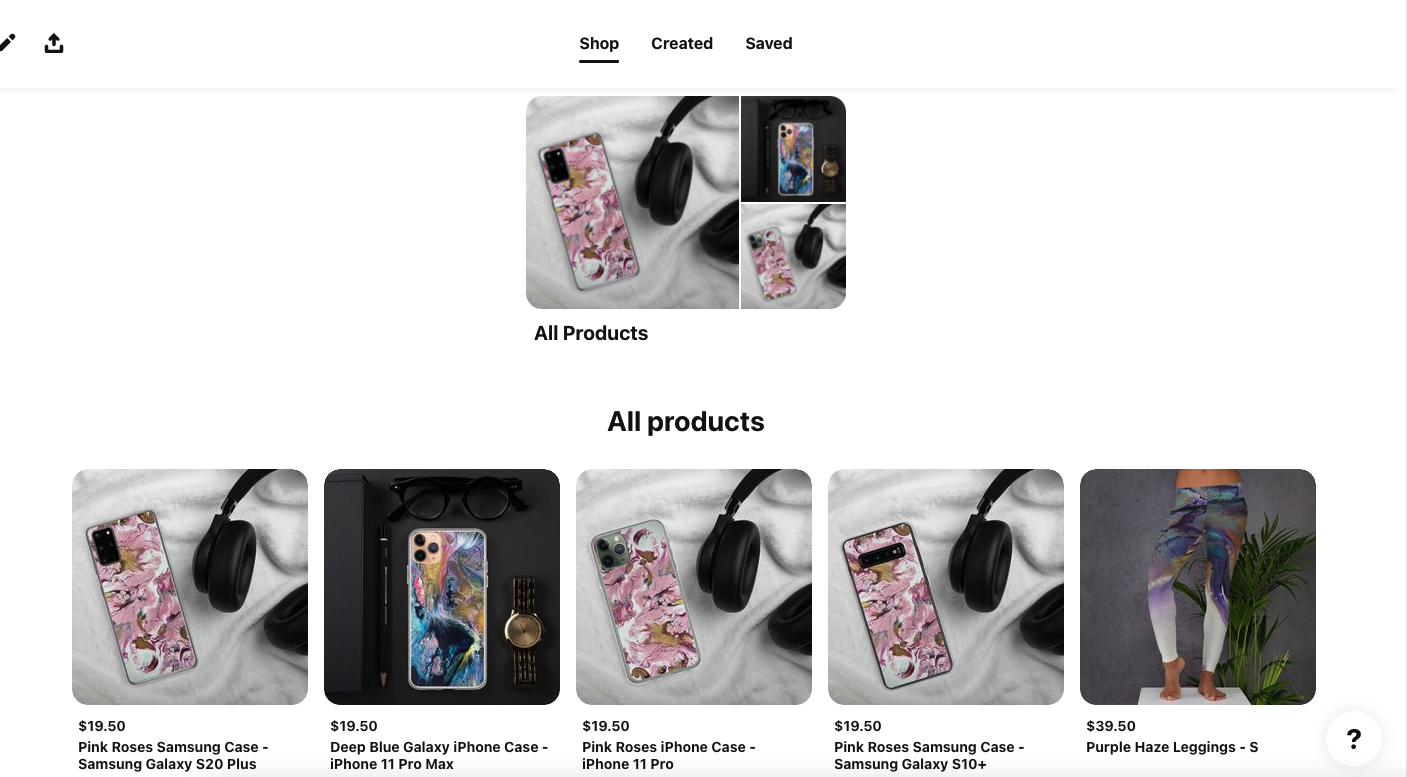
Think about the ways you’ll want to display items in your store. I knew I wanted to allow people to view all products including a certain design, so I named them all and made sure to add the design name to every product. I also included tags like apparel, canvas, wall art, mugs – whatever seemed relevant.
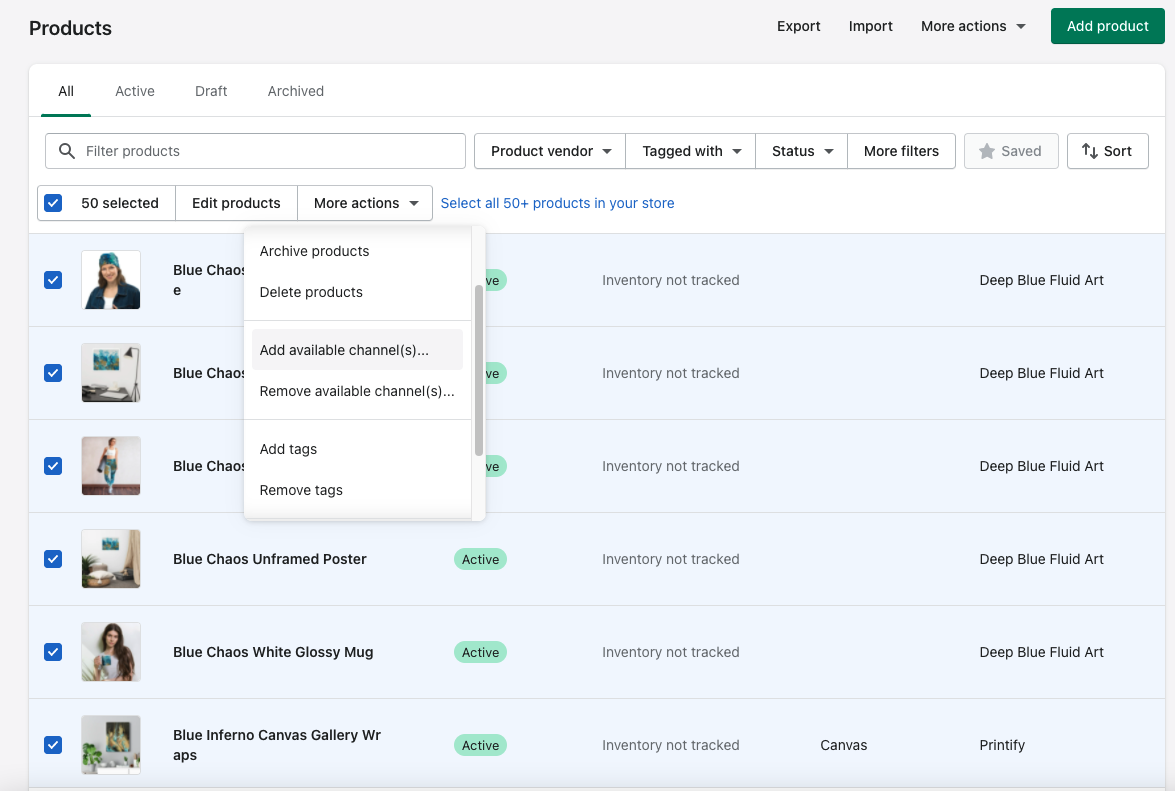
I definitely did NOT get this right on the first try. As I added more products, I needed different, more specific tags. No worries! You can view all your products in Shopify, filter by keyword, and then apply (or remove) a tag in bulk. Oddly, Shopify seems to include ONE non-relevant result in each search, so just do a quick scan of your list before you apply. 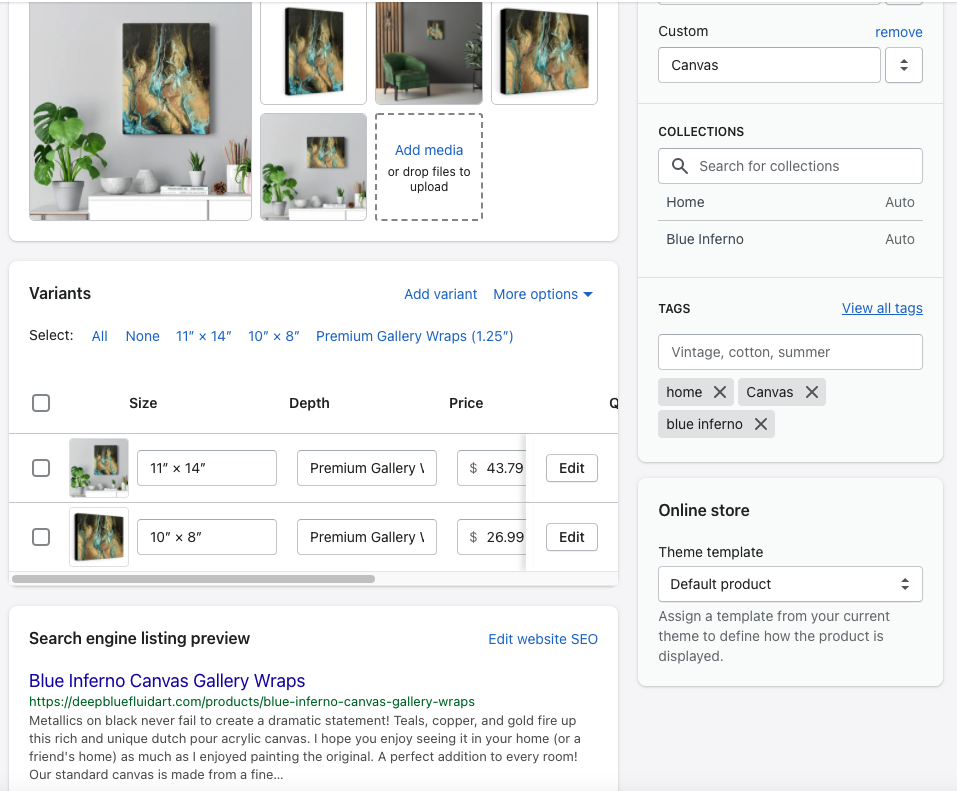

Setting up Collections
Collections might include all your hats, all your mugs, all apparel, accessories, etc. They’re super easy to add to navigation and will later be used for Pinterest advertising. Simply to go Products > Collections and set up as many as you want. Then add them to your site navigation.
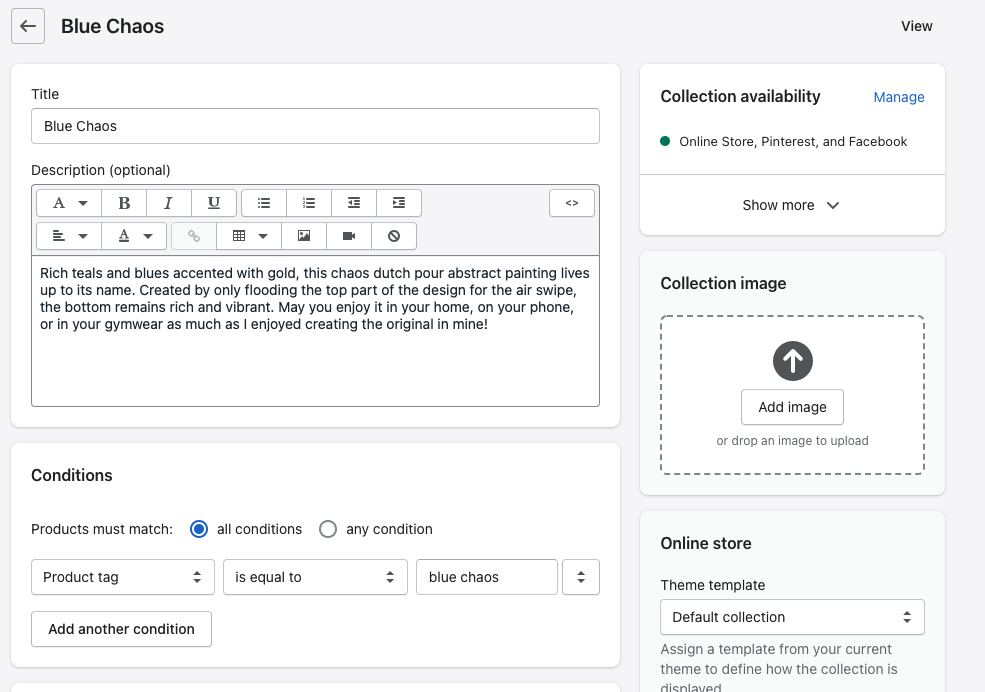
Here is my collection for all the items with the “Blue Chaos” design. Since I’ll link to that in the main menu I’ll want to include a decent description. The collection is created when you set a condition. This is where all that tagging you did comes to life!

Adding the Boring Legal Pages
In Settings > Legal, you can enter everything you need for your refund and privacy policies, terms of service, and shipping information. Make sure you use the shipping information provided by your supplier, if applicable. You can start with their template and adjust as needed.
If you want to be approved as a verified merchant on Pinterest, and otherwise keep yourself out of trouble, don’t skip this step!
Adding Blog Posts (Optional)
I created one so I could include the video of the making of one of the more popular designs. I’ll probably add more posts in the future, we’ll see. I had my doubts about using anything other than WordPress, but it’s very easy. Just go to Sales Channels > Online Store > Blog posts to get started. Don’t forget to add it to your site navigation.
Site Navigation
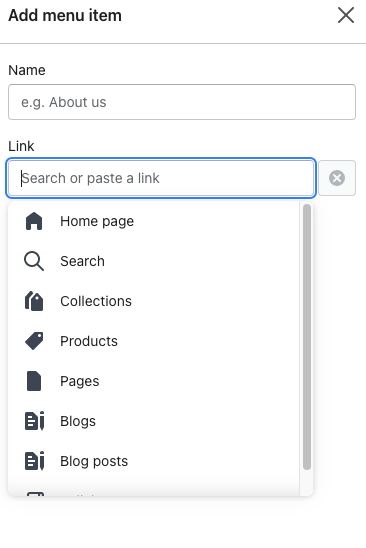

Site navigation is set up under Sales Channels > Online store. I edited my main navigation. When you add a menu item, in the “Link” field, either type a URL or choose another option. This is where your Collections are really handy.
You can create a nested menu by dragging and dropping the items just a bit below and to the right of the parent item. Easy Peasy!
I also added my legal pages to the footer menu.
Time to completion: 5 minutes
Setting Pricing
Both Printful and Printify will suggest pricing for you, but remember, this does NOT include shipping. You can let them figure and charge pricing for you, but since I had set up free shipping over $25, I had to be careful that my retail prices would cover that. The margins are pretty low, so if you don’t adjust to cover shipping, you could easily end up losing money from a sale.
Shipping charges vary by item type, so make sure you know exactly what you’ll be charged before you set a price for an item.
I found it tough to remember what I charged for, say, flip flops, and found myself with prices all over the place. Fortunately it’s really easy to edit a product right in Shopify. It syncs to your apps and your store almost immediately.
Add Some Branding to Your Packaging
Printful allows you to add a black and white logo, email address, phone number, and message to your packing slips for FREE. So, why not?


Shopify Customer Service
I had an issue (remember when I said you have to set up free shipping in your app shipping options???) and Bjorn was incredible. He accessed my own account and provided lots of screenshots and walked me through setting up the correct shipping rates, refunding the shipping cost to the customer (oops!).
He went beyond just fixing my problem and suggested several other things I could do to improve my store and increase sales.
One was to add social icons to my site. I hadn’t been able to figure that one out! Hint: it’s in Theme settings, but then you have to go to the Footer and click the box to display social icons.
The next suggestion was to add Facebook and Instagram shopping. This was on my list, but I hadn’t gotten to it. His suggestion pushed me to get it done.
I give them an A+ for customer service!
Add Facebook and Instagram Shopping
I didn’t have a Facebook page for my store, so that was step one.
Back to Shopify, go to Sales Channels and click on the + icon. Find the Facebook option and it will walk you through the process.
It took several (frustrating) minutes for my new Facebook page to become available (I was sure I was doing something wrong). But other than that it was a simple process. It applies for you, and this morning I got a notification that I was approved! I then edited an Instagram post and added a product tag. So easy! You can now also configure your Instagram shop, adding or removing items as you like!
For Facebook shopping, well, I haven’t figured that out yet That’s next!
Add the Pinterest Product Feed App
If you want Pinterest to create Pins for each of your products (and each variation of each product), you want the Pinterest app from Shopify. It takes about a minute to set up. Just search for it in Shopify apps.
BONUS! This process will also claim your domains for you on Pinterest.
In a few hours, Pinterest had scraped my site and created 172 new product Pins for me. Cool! A few hours after that, I got a call, an email, and a text message from Pinterest with an offer to talk about advertising. Plus, I got a $100 add credit. SCORE!

One little thing I did have to do that was not at all obvious was to make the products available to the Pinterest sales channel. You can use the same setting to add products to your Facebook / Instagram shop. Remember to do this for every new item – by default they are ONLY added to your online store and NOT to other channels.

Applying for Pinterest’s Verified Merchant Program
Hooking your Shopify store up with the Pinterest app does all the hard stuff (connecting a catalog and adding your tag) for you. Since I had my domain-specific email and all the legal pages I needed, I went ahead and applied. Usually they want your store to be up and running for at least three months before they’ll approve you, but the worst that can happen is that they say no. 🙂
I also created an Idea Pin, a video Pin, and a static Pin – all with product tags!
Update! I got approved! Don’t skip the boring legal pages to increase your chances of acceptance.
Sharing My Store with the World


In truth, this store is 90% marketing experiment, 10% because people sometimes inquire about my art. I was overwhelmed by the outpouring of support from friends and colleagues alike. Receiving my first order a few days later was a particularly nice gift. Now I just need 2.5 more orders like that to cover the $29/month for Shopify. 🙂
What’s Next?
Once I get my samples, I will try running a few ads, but I’m reluctant to invest too much in this experiment. I do hope it will at least cover the monthly costs so I can keep it running and continue trying new things. I’ve created a few Pins of my own – an Idea Pin with product tags, a video Pin, and a static Pin with product tags. My intention is to do that for each design that’s available in my shop. Ideally I’m adding one per week. #goals
If you want to see the store, feel free to stop by!
Have you set up a Shopify Store with Pinterest integration? I’d love to hear about your experiment. If not, and you want to – what’s holding you back? Maybe we can figure it out together.
And remember, I’m available for marketing consulting for content, product marketing/launches, Pinterest, and more. I’d love to hear from you.
Pin me for later:

Related Posts


Latest posts by Alisa Meredith (see all)
- How Much Do Pinterest Ads Cost? - December 10, 2021
- Surround Sound Marketing – The Content Strategy of the Future - November 29, 2021
- How to Build Your Business with Word-of-Mouth Marketing - November 18, 2021